
Getting started with the Vates virtualization management stack
New to Vates VMS? Get up and running quickly with this practical guide to deploying and managing your virtualization stack.


This guide is designed to help you get started quickly with the Vates virtualization management stack. It follows a practical approach, from installing the hypervisor to performing your first day-to-day operations using Xen Orchestra.
It reflects the current state of the stack, including recent versions of XCP-ng and Xen Orchestra, with Xen Orchestra 6 now enabled by default on the latest branch.
1. How to install XCP-ng
Let’s get things started by installing XCP-ng, the hypervisor layer of your virtualization stack.
To begin, download the latest installer from the official XCP-ng website. Today, the current LTS branch is XCP-ng 8.3.
You have two options to install XCP-ng:
- Full ISO installation (recommended for most cases)
Download the full ISO (XCP-ng 8.3 LTS) and create a bootable USB key.
If you’re on Windows, Rufus is a common choice to create the bootable media. - Netinstall (lightweight installer ISO)
The netinstall image is a smaller ISO that contains only the installer (no packages). It can be convenient if your download link is slow, or if you install via remote virtual media (IPMI).
Installing XCP-ng on your physical server is straightforward: boot from the USB key and follow the installation wizard (disk selection, networking, basic settings).
Here’s a video tutorial you can use as a visual walkthrough:
2. How to deploy Xen Orchestra
Xen Orchestra is the central management, administration, and backup interface for your virtual infrastructure. It provides a complete set of features, including virtual machine creation, live migration, resource delegation, full and incremental backups, replication, and day-to-day operations.
You should also have an account on the Vates portal, which will make the registration and activation process of your appliance easier.
The next step is to deploy your Xen Orchestra Appliance (XOA). To simplify deployment, Vates provides a dedicated deployment tool for the Xen Orchestra Appliance.
From there, you simply need to follow the instructions provided by the tool. The appliance will be deployed automatically and connected to your XCP-ng host.
For additional guidance, a video tutorial is available to walk you through the deployment process step by step:
If the deployment tool does not work in your environment (for example due to network constraints or restricted access), alternative deployment methods are available in the official documentation. These include manual deployment using an installation ISO or other supported approaches.
Xen Orchestra follows a regular release cycle, with monthly updates that can be applied directly from the XOA interface using the Update panel.
You can choose between two update branches:
- Stable branch: a thoroughly tested branch with a slight delay, recommended for environments where maximum stability is required
- Latest branch: the most up-to-date version, providing faster access to new features and improvements
On the Latest branch, Xen Orchestra 6 is now the default interface, so no manual switch is required. Both branches benefit from the same level of care and long-term support.
For detailed information about each release, you can refer to the Xen Orchestra blog:

3. How to begin your trial period
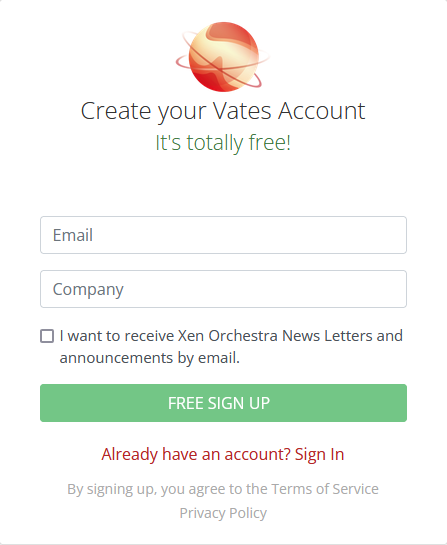
To start your trial, create your Vates account. It’s free, requires no credit card, and comes with no commitment.
Once your account is created, you need to register your Xen Orchestra Appliance using the same email address. This step links your appliance to your Vates account and enables access to subscription features. If needed, the official documentation provides step-by-step guidance for this registration process:
After your appliance is registered, simply click the “Start Trial” button from the interface. Then go to the Update panel of your appliance and apply the update. Once the update is complete, your trial is active.
Your trial period lasts one month and gives you access to the Vates Virtualization Management Stack through the Trial Enterprise Bundle.
This trial bundle is designed to let you experience the platform in real conditions. It includes access to the full feature set and tools available in Vates VMS, as well as the expertise of the Vates Pro Support team. The only exclusions during the trial period are guaranteed response times and 24/7 support coverage.
4. A quick tour of your VM interface
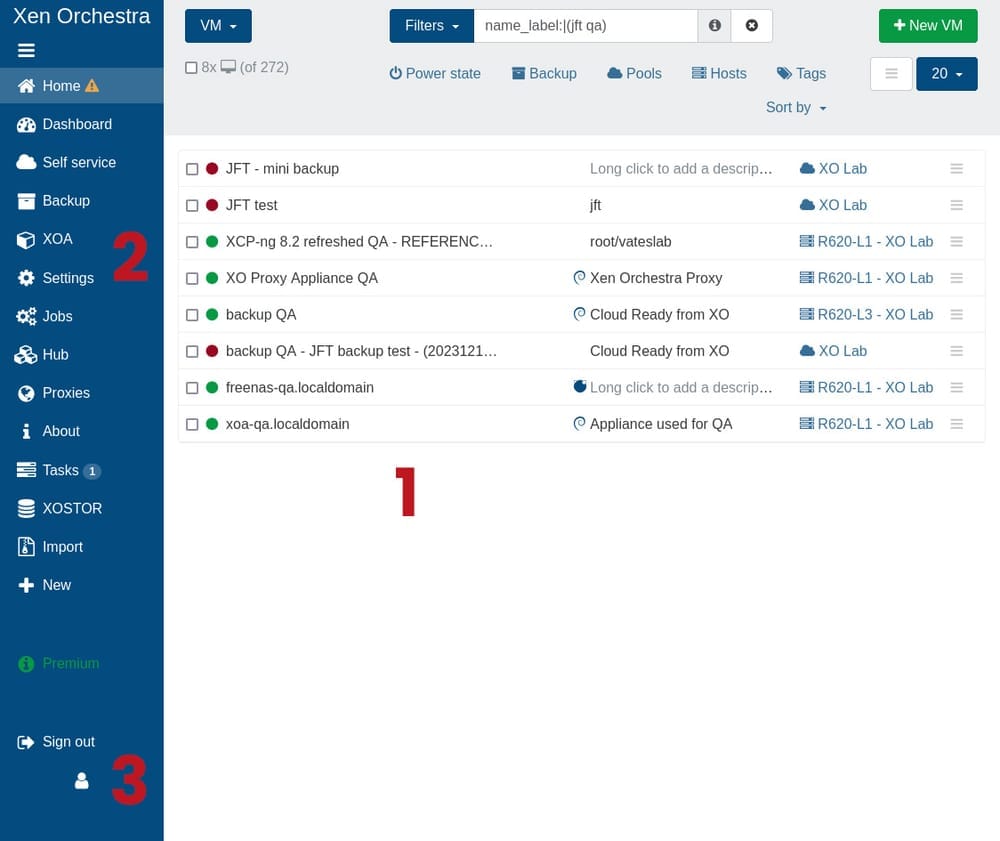
Above is your view of the Xen Orchestra homepage.
- From the main dashboard, you get a global overview of your infrastructure. All your virtual machines are listed in one place, along with key information such as their description, current running state, and the pool they belong to. This view is designed to give you immediate visibility into what is running and where.
- The blue menu on the left side of the interface provides access to all the core features of Xen Orchestra. From there, you can create virtual machines, manage backups, access self-service features, and navigate through the different parts of your infrastructure.
- By clicking on the user icon in the top corner, you can access the UI settings. This section allows you to personalize your experience in Xen Orchestra, for example by defining default filters or adjusting interface preferences to better match your daily workflow.
Tags in Xen Orchestra are a flexible and powerful way to organize and manage your virtual machines, especially in larger or more complex environments.
By assigning tags to your VMs, you can:
- Categorize them based on criteria such as purpose, environment, or ownership
- Easily filter and perform batch actions on a specific group of virtual machines
- Combine tags with features such as Smart Backup to automatically include or exclude VMs from backup jobs based on their assigned tags
Used consistently, tags help keep your infrastructure structured and make day-to-day operations significantly more efficient.
5. How to create your first VM
From the Xen Orchestra homepage, use the blue menu on the left-hand side and click “+ New” to start creating your first virtual machine.
Prerequisites: add your XCP-ng server to Xen Orchestra
Before creating a VM, you need to have at least one XCP-ng host connected to Xen Orchestra.
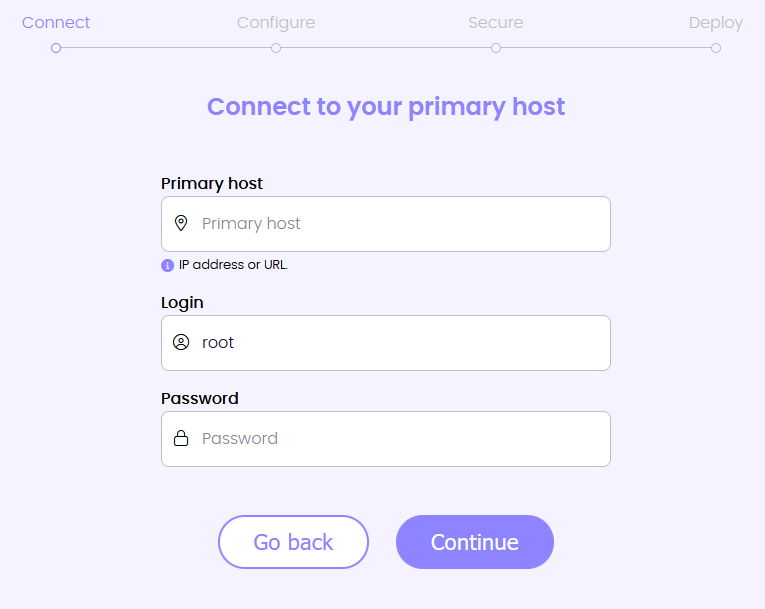
If this is your first setup, you can add your server directly from the Xen Orchestra homepage by clicking the “Add server” button and providing the host IP address and credentials.
You will also need an ISO SR containing the operating system you want to install. This ISO must already be available on your XCP-ng host.
Step 1: prepare to create a new VM
Once your server is added, go to the “+ New VM” section.
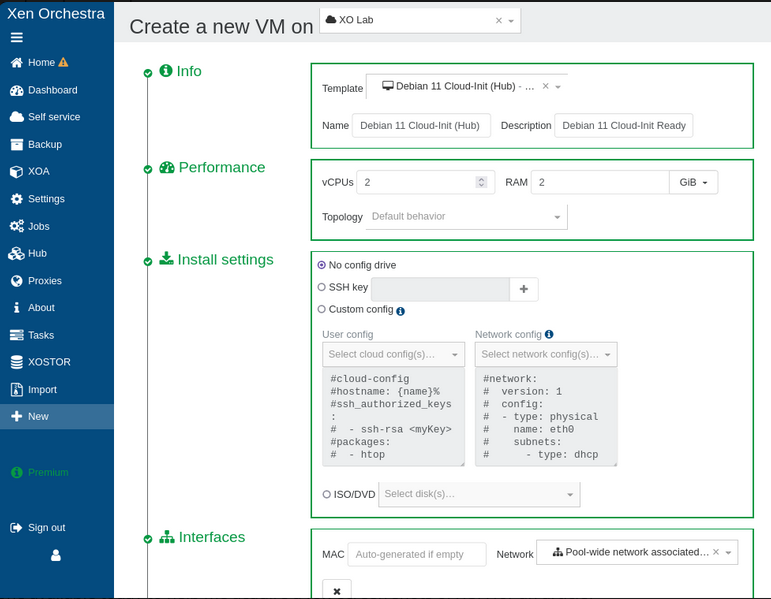
Start by selecting the pool where the virtual machine will be hosted. Then choose the template you want to use. Xen Orchestra will guide you through a form where you can define the main characteristics of your new VM.
Step 2: configure your VM
In the configuration form, you will be asked to define the following settings:
- Template: choose the template matching the operating system you plan to install
- Name and description: give your VM a clear and meaningful name
- CPUs and memory: allocate the appropriate number of vCPUs and the amount of RAM
- ISO/DVD: attach the ISO SR containing your operating system
- Storage: select the storage repository and define the virtual disk size
- Network: choose the network the VM will be connected to
These settings can be adjusted later if needed.
Step 3: install the operating system
Once the VM is created, start it from the main view.
Open the Console tab to proceed with the operating system installation, just as you would on a physical server. From there, follow the standard installation process for your chosen OS.
Step 4: finalize and optimize
After the operating system is installed, make sure to install the appropriate guest tools. These tools improve performance and enable better integration between the VM and the hypervisor.
Your virtual machine is now ready. You can fine-tune additional settings such as auto power-on, dynamic RAM, or protection against accidental shutdown or deletion directly from the Advanced tab of the VM.
6. Save / Export your XOA settings
After finalizing your initial configuration in the Xen Orchestra Appliance (XOA), it is strongly recommended to export your settings for safekeeping. You can do this by navigating to Settings > Config, where you will find the export and import options for your XOA configuration.
Regularly saving and exporting your XOA configuration is a best practice. It allows you to quickly redeploy your environment in case of host failure and makes it easier to recover critical information such as backup and restore paths. This ensures a smoother recovery and management experience overall.
Even if your original XOA is lost, you can redeploy a new appliance and restore your virtual machines and configuration with confidence.
To further simplify this process and keep your configuration up to date, Vates users with a support bundle can set up automated exports of their XOA settings.
Step 1: access the Backup view
From the main menu, navigate to the Backup section.
Step 2: initiate a new backup job
Click on the “+ New” button located in the top-right corner of the Backup section.
Step 3: choose the type of backup
From the backup type selector, choose “XO config & Pool metadata backup”.
After selecting this option, you can choose to back up:
- the Xen Orchestra configuration,
- the pool metadata,
- or both.
Step 4: create a schedule
Define how frequently you want this backup job to run by creating a schedule that fits your operational needs.
Once configured, the job will run automatically according to the defined schedule.
That’s it. You now have a regularly running backup of your Xen Orchestra configuration and pool metadata, helping ensure continuity and faster recovery in case of an issue.
7. How to create a backup

Backups are a core feature of Xen Orchestra and can be configured directly from the interface.
Step 1: access the Backup view
Navigate to the “Backup” section from the main menu.
This view centralizes all backup jobs, schedules, history, and execution status.
Step 2: initiate a new backup job
Click on the “+ New” button located in the top-right corner of the Backup section to create a new backup job.
Step 3: configure basic settings
Start by defining the core characteristics of your backup job.
Select backup type
Choose the type of backup you want to create. The available options are:
- Rolling Snapshot
Suitable for frequent, point-in-time snapshots with fast execution - Full Backup
A complete backup of the VM, typically used for daily or weekly protection - Incremental Backup
More storage-efficient, as only changes since the last backup are saved - Full / Incremental Replication
Similar to full and incremental backups, but targeting another XCP-ng host in order to minimize downtime in case of a disaster
Name your backup job
Give your backup job a clear and descriptive name to make it easy to identify and manage later.
Step 4: configure specific settings
Depending on the backup type you selected, additional options will be available. Common settings include:
- VMs to back up
Select individual VMs or groups of VMs to include in the job - Schedule
Define how often the backup should run (daily, weekly, or custom schedules) - Storage
Choose the storage repository where backups will be stored - Retention
Specify how many backup copies should be kept
These settings allow you to adapt the backup job to your operational and retention requirements.
Step 5: create a backup schedule
Define when and how often the backup should run.
You can:
- Create one or multiple schedules for the same backup job
- Decide whether to enable a backup health check to validate backup integrity
This flexibility allows you to combine different protection strategies within a single job.
Step 6: review and save
Before finalizing the backup job, review all settings to ensure everything is configured as expected.
Once ready, click “Create” or “Save” to activate the backup job.
From that point on, backups will run automatically according to the defined schedule.
Step 7: monitor and manage backups
After the job is created, you can monitor and manage it directly from the Backup section.
This view gives you access to:
- Upcoming backup tasks
- Execution history
- Status of the latest backup operations
This makes it easy to track backup activity and quickly identify potential issues.
You should regularly test the integrity of your backup files. Xen Orchestra allows you to perform automatic or manual recovery tests, helping ensure that your backups are usable when you actually need them.
8. How to restore a VM
VM restoration is handled directly from the Backup section in Xen Orchestra.
From the Backup view, switch to the Restore tab, which is available among the top panels of the page.
Restoring a virtual machine with Xen Orchestra is a straightforward process:
- Select your remote and click on the eye icon to display the list of available virtual machines
- Choose the backup you want to restore from
- Select the storage repository (SR) where the VM will be restored
Once confirmed, Xen Orchestra handles the restore process automatically.
Xen Orchestra also provides file-level restore capabilities, allowing you to recover specific files from a backup instead of restoring the entire virtual machine. This offers a precise and efficient recovery option when only part of a system needs to be recovered.
9. Use your Health dashboard
From Dashboard > Health, you get a consolidated view of the overall health of your infrastructure and virtual machines. This dashboard is designed to help with predictive maintenance and should be reviewed on a regular basis as part of normal operations.
The Health dashboard highlights potential issues such as Unhealthy VDIs, Orphan VDIs, Orphan snapshots, and other consistency or storage-related warnings. These indicators help detect problems early, before they turn into service-impacting incidents.
If you see entries in any of these tables, it is strongly recommended to investigate them promptly.
For users running Xen Orchestra with a subscription (or during a trial period), the best next step is to open a support ticket. This can be done directly from the Support section of your Xen Orchestra Appliance.
If you are using the source version as a homelabber, the community forum is a valuable resource where you can ask questions and share findings with other users:
Managing storage space utilization
Maintaining sufficient free space in your Storage Repositories is essential to ensure smooth operation and data integrity:
- For NFS or any thin-provisioned SR, keep at least 10% free space as a safety buffer
- For iSCSI or any thick-provisioned SR, maintain a minimum of 20% free space
10. How to get support for Vates VMS
Vates is committed to supporting users at every stage of their virtualization journey, with support options adapted to different use cases and environments.
For organizations running the Vates Virtualization Management Stack in production, professional support is available for both XCP-ng and Xen Orchestra through Vates VMS.
Vates VMS bundles combine XCP-ng Pro Support and the Xen Orchestra Appliance into a single subscription, providing a consistent and predictable support framework for production environments. These bundles are designed to simplify operations while giving direct access to the teams behind the technologies.
You can learn more about the current Vates VMS bundles and what they include in this blog post:

Vates’ approach to professional support goes beyond traditional models. It is built around open-source principles, transparency, and close collaboration with users. To better understand this philosophy and how Vates redefines professional support in the open-source ecosystem, you can read the following blog post:

For individuals, home users, and students, the community forums are the primary support channel. Dedicated sections for XCP-ng and Xen Orchestra allow users to ask questions, share experiences, and benefit from the collective knowledge of the community:
Whether you are operating a production infrastructure or experimenting in a lab, there is a support path aligned with your needs.